DIY cloud light ( led cloud lamp)
Want an imaginary decoration ? Create a diy cloud light and give character to your interior decoration! Creating a roof full of romantic clouds is probably the dream of every lightning and thunder fan! Did you know you can create a 100% cloud decoration?
And yes, cloud lights come in various forms: art pendant lights, secret ceiling lights, beautiful bedside lamps, and more. With this article of DIY724, turn your ceiling into a great sky covered with led cloud light! How does it work? Join us to find out the answer to this question.
What is a cloud light? and How to DIY Cloud Lamp?
In this video of Brittany Xavier, We’re going to show you everything we used step-by-step to complete this project, the final result was really cool!
Supplies:
- Poly-fil
- Spray Adhesive
- Poster Board
- Staple Gun
- LED Light strips
The cloud lamp is an artistic accessory suitable for all decorative styles, including classic, minimalist, rustic, chic, bohemian, vintage, etc. To create a lively atmosphere and a lively decoration with diy cloud light, you can decorate your raindrops with a cloud or fairy lamp.
Cloud ceiling light
Ceiling lamps, apart from the lighting of our interior space, can have a fundamental decorative role. You see the magnificent cloud lamp in the picture above. This great diy cloud light and pendant lamp transforms your living room and at the same time gives originality to your decoration! Customize our living rooms with our tutorials!
To create a beautiful cloud light like a handmade pendant light above, you need to equip yourself with the following materials:
- a ball-shaped paper lantern (or a paper lantern),
- polyester filler fibers (or artificial snow),
- LED lamps,
- Spray glue,
- and a cable.
Recommendations for diy cloud light
- Regarding the size of your future cloud lamp for diy cloud light, we want to give you some valuable advice. When choosing a paper lantern, be careful that it is not too bulky because it will ruin the living space once it is covered with fake snow. To avoid this type of problem, we invite you to choose a medium-sized paper lantern. Of course, you do not have to follow these instructions, especially if you want to make your cloud lamp a flagship in interior decoration!
- Another bright tip to help you boost your cloud lamp is be careful when choosing LED bulbs! If you want your living room to be well lit, you have to select an extreme light, mainly since artificial snow absorbs a lot of light from the lamp. So, try to find a relatively powerful lamp, which can illuminate the sky of your living room.
- Then it would help if you used spray glue to cover the paper lantern with polyester filler fibers in your diy cloud light. You can also use wallpaper paste or, why not, glue guns. Practical tip: Do not cover the bottom of the paper lantern with fiber liner to let the light beam out from below.
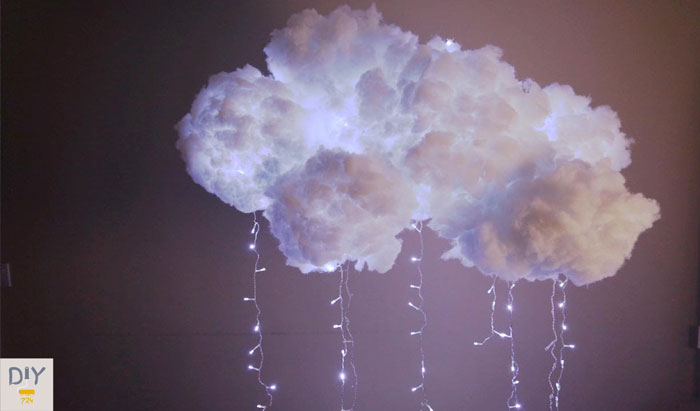
How to prepare a bedside diy cloud light
Want to know exactly what it’s gonna take to make your very own cloud lamp? In this video of superholly, are All the logistics! Check it out, follow along, and you’ll be enjoying sunsets inside your bedroom in no time!
Some things like clouds, the sea, and mountains are soothing and inspiring, but you can not always go outside to look at them. By creating a diy cloud light, you can enjoy seeing it in the sky of your home whenever you are indoors. This tutorial is straightforward.
Just be a little patient and follow it with interest. Stay with us.
Construction processes of diy cloud light
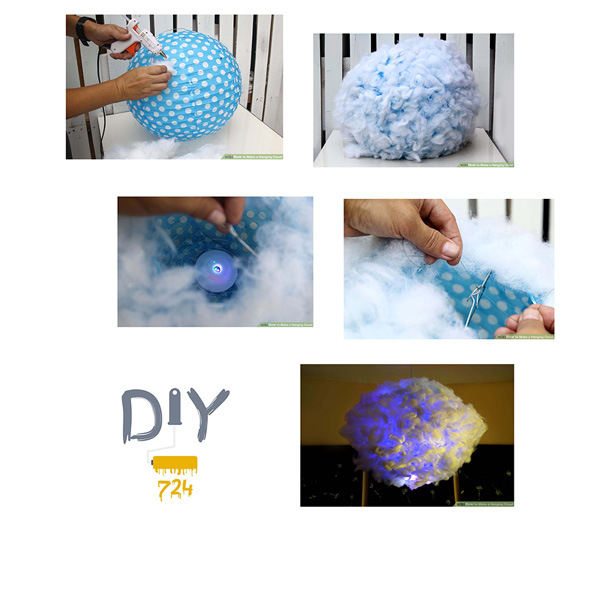
- Open a circular paper hanger. If you want a giant cloud, attach two more circular pendants to it.
- Using hot glue, stick cotton to the surface of the paper circle. To do this, take a large piece of cotton, pour a little hot glue on the place where you want to stick it, and put the cotton on the bond.
- Continue to stick the cotton on the surface of the paper circle. Choose small and large liking pieces that fit together to be more cloudy. Make sure all parts of the paper circle are covered with cotton.
- If there are empty places in the circle, you can fill it with small pieces of cotton. To do this, pour hot glue on the blank part and put some cotton on it.
- Slightly stir the surface of the cotton so that part of it becomes high-density and part low-density. In this way, it will look more like a cloud.
- Connect your desired lights to it. If you want to work fast and efficiently, you can use LED lights. Make sure that the lights do not generate too much heat on their own. Otherwise, they will burn out very quickly.
- Tie an invisible line to your cloud. Cut a long piece of fishing line. Tie this thread to the wire inside the circle.
- Attach the cloud to the ceiling. Tie a small loop to the end of the fishing line to hold the cloud more firmly to the top. Insert the ring into the roof hook and you have your diy cloud light.
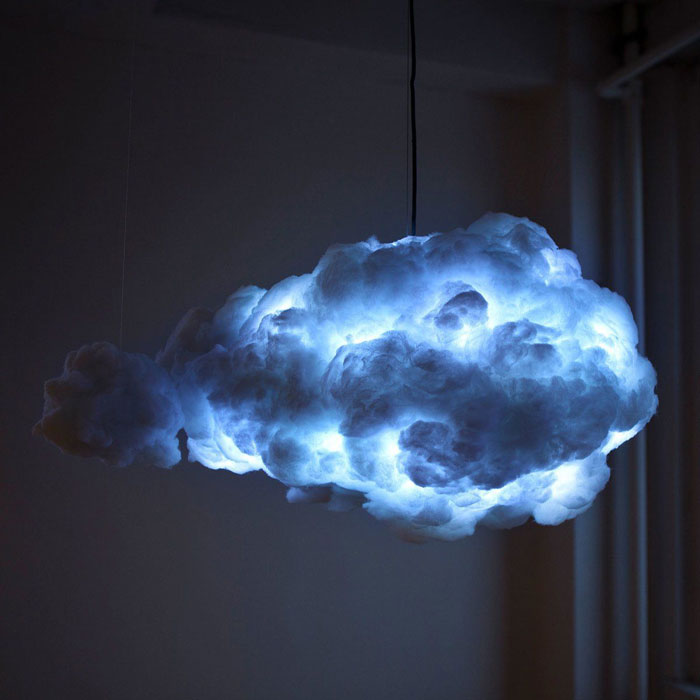
Desktop bedside lamp
In this video of TiffyQuake we are recreating one of the most popular DIYs! We are revamping a DIY Cloud light! This light is made with LED lights and is completely customizable. It also can detect music so it changes with the beat!
Admire the abstract beauty of this beautiful cloud lamp that enlivens this solid wood table! We suggest you turn your old bedside lamp into a magnificent jewel of modern design! To create a bedside diy cloud light in the shape of a cloud, we ask you to follow the exact instructions for making a cloud pendant.
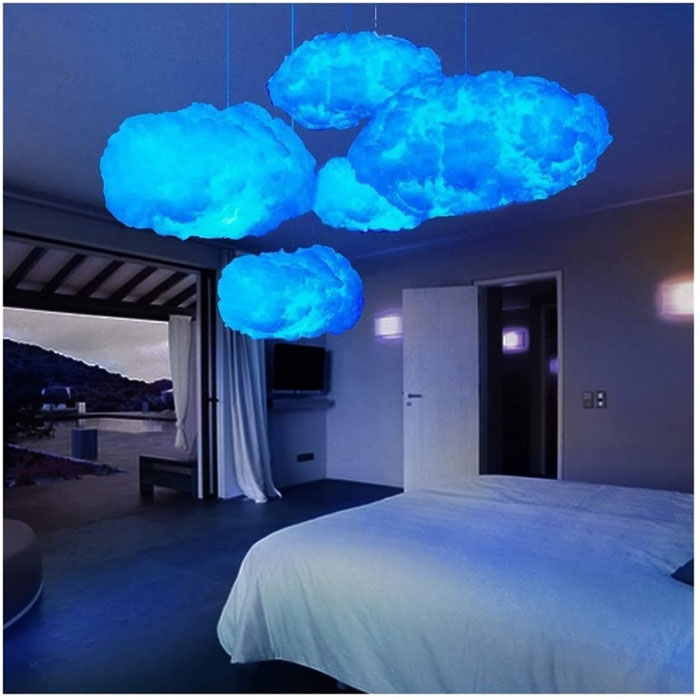
You can find diy cloud light in the living room as well as other rooms. Whether in the bedroom or the dining room, the cloud lamp brings a note of romantic elegance to your decoration!
Cloud lights, both in terms of beauty and the original type, turn the living space into a natural, cozy cocoon by creating a happy atmosphere and festive decor! This handmade design can easily find its place among your decorative objects.